Wednesday, October 20, 2010

Whats the damage?

With the crank out, it was now a simple case of knocking the output shaft out and dropping the input shaft out.  I havent yet taken the gears of the shafts, but with the engine case now clear of gears and crank, I could at last inspect.  Heres what I found

1. Yup thats a split main bearing oil seal! no wonder it was burning gear oil.  I cant tell the condition of the bearing, but im going to replace it anyway.  You can see some scoring on the engine case and matching side of the crank - not sure whats caused that, and is it problem?

2. The sheared retaining thread on the input shaft is quite obvious now and the subsequent drift of the input gears has scored the engine case and damaged the rivets of the primary gear - I await to hear what Gransport think of this. I am intregued by the woodruff keyway on the input shaft - there was no matching keyway or key anywhere to be found!

I havent looked at the gear selector yet - they say this can be pretty worn sometimes, but all in all, not a major fail I dont think.


Next step, box it all up and see what the experts think

Crank shaft removal tool

I still wasnt comfortable with just whacking the crankshaft out - its not so much the distortion on the crank that worried me, but the stresses on the aluminum engine housing.
Haynes manual says;
"When removing the crankshaft from the left-hand crankcase half, it must be borne in mind that the crankshaft is a pressed up assembly and can be distorted if the ends are struck.  The official method of removal is to use a special tool. Part Number T.0038886 consisting of a thick steel plate which bolts to the three clutch over threads, with an extractor bolt at its center.  The ingenious and well equipped owner may be able to fabricate a suitable version of this tool, but failing this another method must be found"
Well, that sounded like a challenge to an ingenious and well equipped man, and within the hour, my version of the tool was in place and gently pressing the crankshaft out.  Genius :-)
The tool is now up for sale to any would-be vespa mechanics wary of the 'whack-it-out' technique - £500 ono

This is a 'budget project' - please take note.

I had to drop eldest daughter in town this morning, and it seemed like a good excuse to pop into Gransport seeings as I was passing their door.  I thought I would tap him up for some advice on how to get this crankshaft out without creating any damage.
I am warming to Gransport - my first couple of dealings with them have left me a little cold - as if I wasnt part of their special club (I guess I wasnt much of thier club when all I was buying were bits of fuel pipe and rubber grommets)  But today, they appeared to have much more time for me and my questions - maybe Ive misjudged them, and I'm glad that I was wrong because I have a suspicion Im going to be seeing a lot of them over the next couple of weeks.
I asked about the safe removal of this crankshaft from the main bearing which is still stuck in the engine casing.  Ive read many different reports on how to do it, and how to bugger it up by doing it wrong.  Gransports reply was to hit it! With 'engineering skills', hit it.  There is an indentation on the shaft and a punch lined up with this will keep it central and minimise any damage to the thread.
I asked if I could bring in my box of bits for them to assess, and they were very up for that and warned me that while the engine is open like this it is false ecconomy to not replace bits that you think you can get away with.  He went on to say "You would be better off spending your £500 now than have to keep dropping the engine out and replacing more damaged bits"
500 quid!  500 quid!!  Oh my gosh I hope its not going to come to that.
I will take him up on his offer to look over my parts once they are all out, and take advantage of his prior experience - but he has got to understand - this is a 'budget project'

One Job a Day

A retired neighbour told me the other day that you know when you are getting old when you are content with doing "one job a day" - he was talking about; going to the post-office, washing the car, phoning the doctor etc, but this made me think about this scooter.
Just recently Ive been trying to get lots of things crammed into my day and it would be very easy to simply let the scooter drop off my list of things to do - and so Ive been trying very hard to get an hour or maybe two in each day to keep progress - and the way ive been working is to have a plan for "one job a day" - i usually work out what the next step is while I am in bed each night
So bit by bit - in baby steps, I manage to keep the momentum - Even today when Ive got a lousy cold and would much rather be indoors watching black and white film with a cup of lemsip - I just know though that if i were to not press on, i would kick myself when Im well again for not keeping the pace up, even if it is just one job a day.

Tuesday, October 19, 2010

Splitting the engine

My Flywheel extractor tool arrived today, so after a successful morning in the office, i took a lunch break to see how it worked - it worked a treat! so why not strip a few more bits and split the engine case?
note the sheared thread on the input shaft in bottom right corner!


Im not sure if I was pleased or disappointed to NOT see anything disastrous inside, there are a few signs of wear but not terrible.  My hopes and curiosity were raised..... until I noticed that the input shaft seems to have at least an 1/8 inch of back and forth play in it, meaning the big gear (Im sure I will learn the names of these eventually) that is driven by the clutch is slopping back and forth - and there is signs of wear :-)


Turns out on closer inspection the input shaft pin has been buggered - the locking nut and thread has been smashed off! - and by the look of the sheared thread surface, its been like this for some time.  So certainly a new shaft is going to be required. Maybe new gears?? I hope not.

My next focus for problem solving is how to get that bloody crankshaft out of the clutchside bearing.  Haynes and many others say not to wack it out.... but some forums are suggesting it would work.  I might have to make up a tool to press it out against the clutch cover studs...... but then how do i get the bearing out?


I rather liked this chaps approach to bearing fitting (I wonder if it works for bearing extraction?) .....


I am sure the clutch side oil seal is gone but i cant see this until i get that bloody crankshaft out of the way.  A job for tomorrow now maybe

Monday, October 18, 2010

First sight of inside

I had to look as soon as possible.
So off with the head and barrel

 Well it doesnt look too carbonised, but I was surprised by the amount of oil that ran out of the barrel! Clearly all that gearbox oil is finding a easy route out of where its supposed to be.

The barrel doesn't seem to be too badly scored - but im not sure what a healthy piston should look like - the rings look good, but the aluminum piston itself certainly shows signs of scoring

Unfortunately I couldn't get the piston off tonight as I dont have the right circlip pliers (but ive since bought a pair off ebay - £5)  There is yards of lateral movement in the big end and small end (is that supposed to happen?), but I cant at this stage sense any bearing wear.

Im convinced the crankshaft bearings are shot (seals certainly are) as there seems to be some movement in at the flywheel - further inspection will reveal.  Ive got a £6 flywheel extractor on its way to me, but Im not sure if I should buy some bearing extractors or get Gransport to do them for me

So not being able to get the piston out or flywheel off tonight, i stripped and cleaned the carb box and oil pump (thats a jolly clever little device)

Heres a very useful site for anyone stripping a Vespa engine
http://www.vespamaintenance.com/engine/teardown/index.html


Phase 2 begins

In the garage at 7am. 
Engine out and on the bench by 8am.
In the office to start work by 8.30 am.

Phase 2 begins.
It occurs to me that regardless of how nice (or not) my welding is, how neatly ive fitted the floor runners, or how well ive chosen the colour scheme - this bike is rubbish if it cant run properly - and by properly, i mean smoothly and reliably.  I am sure i could get it to run around town as it is now, but it would be rubbish - and so Ive decided I'm going to strip the engine and overhaul it.
With the engine on my makeshift engine bench, i dont see this being a major hassle (major cost? not sure yet)

Having read through the Haynes manual chapter on engine overhaul, they suggest that big-ends and cranks need to be done by a specialist with presses and special tools, and so Ive just phoned GranSport scooters to enquire.
His first question to me was "why are you rebuilding the crankshaft and not buying a new one?"
My first thought was "this could mean one of 3 things"
1. A sign of the throw away times we live in? I cant believe that piaggio himself would have created a component to be expendable - in fact I am rather surprised that the big-end and crankshaft cant be serviced by the average Italian waiter on his way to work on the side of the road with nothing more than 3 spanners and a hammer.
2. Maybe Gransport are just a boutique, interested in only in selling chrome mirror bars and stickers.
3. Maybe he is genuinely giving me some sound advice based on his experience and simple economics.
I pressed him further to explain his first question.  He told me that his 'engineer' charges about 60 quid to do the labour of splitting the crank and pressing it back again with a new big-end bearing (that sounds reasonable - 2 hours work?) but I would also have to buy the bearing and maybe con-rod - could be about 40 quid (Im not sure why he doesnt know these prices exactly).  However a brand new crankshaft and conrod will cost about the same at £100ish.
He suggested I got the engine apart, brought the crankshaft into them to have a look at and then work out what to do from there.
So I am getting my head into gear now to spend another £100 plus another £100? for seals, gaskets, rings? etc? - lets call it another £250.  A lot of money.  But not a bank-breaker and it would at least give me a complete and reliable scooter.  I shall let that number linger in my mind, so that it wont be so painful when I have to pay it out.
My plan now is it do an hour before breakfast and an hour after tea each day - shouldn't take me too long i don't suppose

Saturday, October 16, 2010

A 3 foot bike

Yup Hugh you are right, from 3 feet away, it doesnt look too bad - as long as you are either deaf or you are looking at it parked up and not running

Im rather liking the old english white now - it kind of works with the pale blue and chromey bits

Really want to get that engine out now


And then what?

Its Saturday, the sun is shining and Ive got nothing other to do until 6:00pm tonight.  Today is MY day.  My day in the garage :-)
Most bits are now fitted to the scooter, so after soldering up the wires that I had to cut in order to strip the rear side panels,  I titted around with various nothing bits until I had to face it; Im going to have to see if it starts.

Ive moaned already about the size of my garage, so I wont do it again now but suffice to say, there was no way I could even kick start the thing in the space that I'd built myself into and so I resolved to tidy the garage up.  Everything came out - including the Trike on its jig (yes! you remember the Trike? its still there and not forgotten).  I managed to throw some junk out (including the old rusted floor that I so wanted to keep for posterity until Hugh woke me up and I realised 'Why?') and at last I had some clear working space and access in and out of the front garage door - which I am going to need if Im going to use this scooter as a regular mode of transport

Again, I managed to find lots of fiddly bits to do to distract me from actually kicking it over - why was I avoiding this?  Finally however, i could delay no longer.  I checked the spark - yes, a good one, Fuel tap to "Aperto", Ignition on,  Kick - 1, 2, 3 - She Started!
I was delighted that she started so easily - all electrics seem to be ok - fantastic :-D
....... ooh hang on!....

....What the hell is all that noise? I drove it round in a circle outside the house - the clutch and gears seem to be ok (though there is still some fine cable adjustment to be done), but it sounds terrible.  A real clunking / clattering sound from the engine, and its blowing white smoke.  I remember it blowing smoke when I first started it a few months ago, but i dont remember the clattering.  I have to guess that the auto oil lubrication is working ok, but I thought I would check the gear oil (even though the noise isnt a gearbox noise).  Now, Ive never checked the gearbox oil - there was no need really until now - and I was surprised at how empty it was - 3/4 pint?
I started her up again - OMGosh - white smoke everywhere, and still clattering.
I switched off, tidied up and came in doors to write this blog.  I think this is my way of walking away from the problem to 'incubate' on it.
Clearly there is a big difference between "Starting" and "Running".  And a big difference between "Running" and "Running well"

So this is where I am at - Scooter is pretty well complete now - why Ive even fitted the mirrors and twist grips!  But it clearly isnt a runner.  My first guess is the crankshaft is, well, 'shafted'.  Im guessing the seals are gone and this is where all the gearbox oil has disappeared to - out through the exhaust in the form of thick white smoke.  And so I am starting to accept, that maybe this project isnt quite over yet - i can see an engine rebuild coming on.

Bit by Bit

An hour here and an hour there.  A moment before breakfast and a spell after supper.  Bit by bit ive been putting this scooter back together again, and all the while I keep saying to myself "I reckon if i had  full day on this I could get this finished"
I have to say, Ive rather enjoyed it like this.  As much as I want to get the thing finished, its been nice to have a gentle and regular run at it.  I imagine it must be a bit like doing a 2000 piece jigsaw on your dining room table - you want to get it done and out of the way, but it can only be done a bit at a time inbetween everything else thats going on.
Everything has been pretty straight forward really - as you would expect I guess - everything came off the bike so there is no reason why it shouldnt go back.
I decided not to check every wiring connection for continuity - this might come back to haunt me, but I just couldnt face it and really wanted to press on.

Ive fitted new floor board runners, and that was a bit of a pig.  The kit comes with some roughly bent aluminum extrusions, a length of rubber insert and a bag of odd rivets.  I couldnt work out what to do with the rivets provided, so improvised by using 3mm dia x 9mm long pop-rivets to hold the runner endcaps down, and a bunch of 2BA screws and nuts for the fixings in between.  It seems to have worked, but this is clearly not an efficient production method.

I was leaving the legshield trim to pretty much the end, as i thought this would be a simple cosmetic clip-on.  Turns out, it was a bitch of a job.  I had to resort to internet forums to see how others had done it.  There are a variety of ways but in the end i opted for 1. lashings of waxoyl to encourage the trim to slip on,  2. two bits of shaped plastic to help open the trim over the leg-shield edge,  3.  Remove the tool box.  I didnt want to do this, it feels like going backwards, but its only 4 nuts and it did give me some much needed access, and 4. work two inches at a time - this was a top tip on one of the forums - and i agree, focus on the now,  and not the flying end that is clearly out of control and wanging around all over your newly painted mudguard.

So have i fitted everything now?  my box of bits only seems to have some badges and a pair of new handle-bar grips (im leaving these till the very last moment - fitting these will feel like the launching of the Queen Mary).
..... hmm, I wonder if I tightened up all those nuts properly?

Monday, October 11, 2010

Christening the Scooter

I rather like the idea of projects having names - I like the way scooters often have their names and associated graphics airbrushed down the side or across the leg-shield.  And I like the way these names can become metaphorical themes around which magazine articles hang their whole story on.
And so Ive been wondering about the name for my own scooter.
I have been clear in my own mind that this project has not been a 'restoration' - that term tends to suggest work to bring something back to its former/original glory - and this scooter is a way off original condition.
But I have certainly breathed new life into an otherwise dead and written off machine.  And for that reason, Ive been talking about it in terms of "Resurrection" and "Resuscitation" (Ive avoided "Renovation" as that was a former project of mine)  The Jury is still out on what best fits this project.
However, another option for a name came up the other day when Hugh popped in to give some encouragement and quality check the friction of the throttle twist.  I was making excuses and generally squirming about the poor panel-beating finish of the leg-sheild (actually i dont know why i feel the need to make excuses as I am very comfortable with it - I guess I dont want people to think that this is the limit of my skill and craftmanship) - anyway he was very kind about the whole thing and called it a "3-foot bike".  I'd never heard the expression before - but it means that its a bike that looks great from 3 feet away!  I rather liked this - and so I'm wondering if i should simply call the bike "3-feet"

Tuesday, October 05, 2010

Is it all worth it?

Im a big fan of Google, but it does spook me out a bit when I get adverts at the top of my computer screen that speak to me directly, regardless of what I might be doing on the screen at that time.
I haven't done anything 'scooter' today, but nevertheless, a ticker tape ad across the top of my screen caught my attention;

£549 Road Scooter - www.scooter.co.uk - UK's No.1 Selling Scooter - Free Top Box & Screen - 1yrs Warranty

Blimey, I thought.  Thats a brand new scooter for at least 100 quid less than Ive spent on my rebuild!
Is it all really worth it?

Monday, October 04, 2010

Colour-ways

Hmmm,  Im not happy about the old english white that I chose for the plastic parts.  It just looks too insipid alongside the pale blue.
I think it needs something a lot more bold.
Im thinking Orange; though my family think that sounds horrid and have suggested brown - so I shall make my decision when I get to Halfords at the weekend


purple?

or maybe i should try to find the same colour as the frame (BS116C33) and make it all pale blue? 

Budget up date

Ive been keeping a running list of 'bits to buy', waiting for the last moment to actually go and actually buy them.  However, as I progress with the rebuild I find that I cant actually complete assembling any particular area fully as I'm missing a part here and a bit there.  Everything seems to be dependent on each other, and without all the bits to hand I cant make a logical or efficient progress.  For instance, Ive been dancing around finishing off the petrol tank area because I need to lay in the foot brake wiring, but I cant do that until Ive got a new return spring for the foot brake.
And so I eventually had to bite the bullet and order my list of items.
Once again I turned to the ever helpful Kevin Stannard at K and S Scooters in Derby .

1x  foot-brake spring (the one thats in the foot pedal assembly) - £1
1x  Stand spring - £3
1x  Leg shield edge trim (for sake of budget - probably not stainless) - £12
1x  Rear nearside indicator housing (not the orange lens - mine is ok - but the rest of it) - £10
1x  Vespa badge (for the front of the leg shield ) - £5 
1x  Rear bumper. - £12
1x  Pair of handle bar grips (I prefer simple black rubber ones) - £7
1x  Pair of side panel rubber trims (black) - £8
1x pair mirrors (standard handlebar mount.  chrome round?) - £50
1 x gearchange cable adjuster thread and nut - £1
All in all, with postage - £124.

So that brings my Grand total now to - £659.  Bloody hell - thats a lot more than I thought!  and a lot more than I was intending to spend.  And we have to remind ourselves here that Ive been doing this to a tight budget i.e. no frills, no replacement of parts that can be salvaged, and do all the work myself (though I guess the £320 powder coating might have reduced a little if I'd hand sprayed the frame myself?)

Tuesday, September 28, 2010

So much to do and so little time to do it

Im trying to pack a lot of things into my weeks at the moment, which is great but I cant stop thinking about the scooter.  And so I was up with the lark this morning to get an hour in the garage before work.
It was a dark and damp morning - not too chilly - very autumnal, and as I opened the garage door and switched the light on I was struck with how very exciting the scooter is starting to look (I guess in all my rushing I hadn't noticed it before) - Its really starting to look like it could all come together now :-)

So on with the job - Painting the horn-cast, handlebar cowl and mudguard trim - these are all plastic bits that couldn't be powder-coated so Ive bought some cellulose in a can.  This morning it was a wet and dry rub down and 2 coats of primer

And I was still in my office for 7:30am!

Monday, September 27, 2010

handle bars

I thought we were going to have a family night in with a movie - but they all decided they wanted to watch a new telly period drama.  So that seemed like a good excuse to pop out to the garage and assemble the handlebar unit.  Once again it all seemed to go together nicely (though I have no idea as to how stiff the twist grips should be - I would have thought they would be a little freer, but I have left as is - as designed - with plenty of lube), and so it seemed a logical next step to assemble to the steering column.  Here the only challenge was getting all the cables and wires threaded through neatly - I was again very pleased that I'd taken so many photos of the tear-down to help me work out the designed reorder of all the bits

Rebuilding continues

Life is busy busy busy at moment and so im not getting into the garage as much as I would like. Every time I think I have a moment clear in my diary, my wife tells me otherwise! Having said that, she is pretty cool with me and the time I do have in the garage (even allowing me a couple of hours without mentioning once that I should really be getting on with putting the patio and decking back down after last weeks sewage overflow - who is that mystery sewage-pipe blocker?)
And so progress is not as fast as I would like, but the bits that I have managed to do are keeping me excited and enthused.
I'd been pondering for a while as to the perfect order to reassemble the bits.  Clearly wires and cables needed to go in first, but what then? There are so many independencies that nothing can be installed and ticked off as finished - everything seems to need to be going together at the same time.  And so after some head-scratching and procrastination (and with an eye on the limited time I had this weekend) I simple decided to "go for it" regardless of a 'correct' proceedure.
I was rather surprised at just how quickly the front end all came together (note - I havent changed the steering column bearings) and so thought I'd attempt the engine/rear suspension unit too.  And lo and behold, that also seemed to pop in quite sweetly.  I was delighted that the two chassis sides (that I had completely re-fabricated) between which the engine frame bolts was a perfect fit and everything appears to have lined up just right.
So within a couple of hours I had the scooter standing on its own two wheels with the aid of a milk crate for balance.
I had planned to spray black 'stone-chip' paint inside the wheel arches/mudguards but (again with my new 'get-your-finger-out-and-do-something' attitude) decided to simply paint a good coat of waxoyl over the complete inside surface (the propriety waxoyl hand sprayer is bloody hopeless) - I figured that it was perfectly good enough for my needs and this 'resuscitation' project
I havent taken any photos of the rebuild thus far as its not particularly interesting, and the garage is so cramped that I can hardly move to get a picture in there.... Actually I should say, that my cramped garage has been a source of frustration today.  Kids! I thoroughly recommend you working hard at school so you can get good qualifications, so you can get a good job, so you can get a big house with a big garage space, so you can work in comfort all around your chosen project.  PS if you do get yourself a good job and a big house with a big garage, and you are the sort of person who thinks a garage is for storing cardboard boxes or your executive BMW in, then I despair.

Monday, September 20, 2010

The rebuilding begins

Ive been waiting a long time for this moment.  The moment of starting to build the scooter up again.  But I was a little worried about how I might thread the wiring loom back through the tight gap between the headstock and leg-shield without damaging the old (and brittle?) wiring - note, I haven't done any renovation of the wiring loom.  However, as it turned out it was easy peasy.  I wrapped the loom and all its flying ends in a tube of polythene shopping bag, tied it to a length of 3-core electrical cable and simply pulled it through!  So easy was it, I threaded all the new brake, clutch, gear and throttle cables too - and then I was at a bit of a loss what to do.... i hadnt planned to get that much done in such a short space of time.  Will it all be this simple?

I have also put a good spray of waxoyl down through the box section of the frame in an attempt to keep water away from the joints and seams (though I suspect I shall rarely take it out in the rain, and even if I did it would take years and years to rot through the powder coating and then the metal - but it made me feel good all the same)

I am very pleased to have taken the dozens of photos of the strip down - to help me work out which cable threads through which hole with which grommet

Painted but not disguised

I finally got round to taking the bubble wrap off the frame (I still haven't even looked at all the ancillary bits yet) and I must say I am very pleased with it.  I love the colour (which incidentally is BS16C33 Blue), and it looks clean and solid.
My welding is there, warts and all, for the world to to see - but I'm not beating myself up over it.
I should have spent more time flatting the bumps and dinks - but, again,  Im not beating myself up over it.
I reckon if I go fast enough, not one will ever notice ;-)

This frame looks like its got a history, a story to tell.  A few scars and a couple of rough edges, its got character.  Its a rough diamond.

Im loving it more and more :-)


Powder coating

Ive been purposely holding back from writing my next blog post because i was afraid that I might have said something i would regret.  I'd been getting a bit pissed off with the powder coaters - Redditch Shot Blasting.  But before I go on - I am over that now and am now delighted with Redditch Shot Blasting :-)
Remember that I had tried to get the painting done way back in July but they couldnt get it done before I went away on holiday, so on my return I got it into them as soon as I could where I was told it would probably take about 10 days.  10 days turned into 2 weeks.  Then it was going to be Friday, then Next tuesday etc etc.  In the end it took 3 weeks to turn around - time in which I could have finished the rebuild.
It wasnt so much the time it was taking (though I was desperate to get it back) but more the messing with my expectations and logistical arrangements.
The Job cost £270 +VAT and I was a little taken aback at what initially felt like a lot of money to me, especially as it was taking so long to get done!
On reflection - I think I had been unfair to the chaps.  When I did finally get to collect it from them, they had done a marvelous job.  Everything had been thoroughly masked and plugged and some of the pitted areas they had actually layed 3 coats of powder on to buildup the surface.  I am guessing that cost of materials aside, there is probably quite a lot of labour in getting these bits coated.
The only trouble now was - I had only just enough time to get the bits home and in the garage before I had to turn round and dash away for 5 days leaving all those lovely painted bits behind me still wrapped and tantalizingly close to starting the rebuild

Tuesday, August 10, 2010

Rusty Italian Scooters

2 fiat 500s, an Ape, a Dyane and a Renault 12?
I read a fascinating article in a magazine recently that talked about the reputation of Italian vehicles of a decade or so ago being total “rust-buckets”.  In the late ’70’s / early ’80’s - when I was buying my first car, i was advised to steer well away from any Fiat as they would invariably be riddled with rust - so I bought a 1967 Renault 4 for £60..... which was itself riddled with rust! but thats a story for another time.
Anyway, this article;  Apparently, at the end of the cold war, Russia had very difficult trading restrictions forced upon them, and one consequence of this was that there was some sharp dealing going on between countries and Italy did a ‘great deal’ on a shed load of steel.  Everyone was happy.
Turns out that this cheap steel - thousands of tons of it, tens of thousands of cars, hundreds of thousands of scooters? (millions of washing machines?????) - had a nickel content that was just perfect for cultivating rust!
And so for the sake of a good deal, Italy suffered decades of reputation of poor quality vehicles.
As I think back on the rust I chopped out of my own scooter I wonder now if it is made from  imported Russian steel

Thursday, July 29, 2010

Piaggio Museum

Back into italy.  yes we are doing a lot of back and forward. 
As a reward for a long days drive (Croatia, through Slovinia, and across italy from east to west) I was allowed to stop off at the Piaggio museum (just outside the port town of Lovorno) It is a lovely little museum that is predominantly Vespa related, but does also have examples of the earlier Piaggio machines including an aeroplane, a train carriage, and a pair of cable car cabins!
Ive read a little bit about all the variants of Piaggio scooters, but to see them all in one room was both impressive and suffocating - i shudder at the thought of being the stores-man in the Piaggio factory - it must have driven him nuts with so many changes and unique model bits.
Naturally most of the exhibits are the older and so rarer machines - I only saw one PX - and I have to say that they did whet my appetite for perhaps an older more curvey vespa :-)
I was keen to buy a souvenir from the little museum shop - just to show that i’d been there - but i really think that they were over-egging the privilage of being THE piaggio museum by charging those sorts of prices for a t-shirt, and so I shall have to make do with the cheap vespa t-shirt that I bought at a market in Croatia

European helmets

We’ve been traveling around Europe a bit this holiday and spent a week in Rovinj in Croatia (lovely place.  Thoroughly recommend it)  Once again, the place is heaving with modern scooters (with a sprinkling of PXs and interestingly a generous helping of Renault 4s in remarkably good condition!)  However, what makes these scooter riders seem cooler than Ive noticed elsewhere is that they nearly all wear those tiny ‘skid-lid’ type helmets (you know the sort that look no more substantial than a tortoise shell).
I was quite excited by these helmets, particularly as you seem to be able to buy them just about anywhere - clothes shops, supermarkets, souvenir boutiques.  Despite the fact that these sorts of helmets are illegal in the UK, i thought that perhaps it might look cool to have one just hanging from the helmet hook on my own scooter, and so I went to look at some in a road-side market stall.  The stall-holder was very helpful;
Him:  “very good quality”
Me: “Yes they are great”
Him: “I do you a good deal.  Normally 250 kunas” (thats about £30)
Me:  “Thanks, but they are illegal in the UK”
Him: “For you, 200 Kunas” (23 quid)
Me:  “Thats great but we cant use them in the UK.  It is against the law”
Him:  “Yes, its the same everywhere in Europe”
Me: “Oh really?  All Europe?
Him:  “Oh yes.  Here in Croatia too!”
How cool is that - they just refuse to comply with the law and seem to get away with it!
Mind you, I really couldnt bear to even think about what it might feel like to come off a bike with nothing more than one of those and a bikini to protect you!

Where are all the old Vespas?

All projects greasy have to pause for a moment while I go on holiday, but this seems like a good excuse to sit back and reflect a little on the progress so far.  And if I am going to be in the native home of the Vespa, I might get the chance to learn a little more about the scoot, and maybe even pick up some bits!

Well the first thing I notice while here on the continent is that while there are thousands of scooters on the roads, a good many of them are brands Ive never heard of and a very few of them are older vespas (and I havent seen a single Lambretta).  Now when I say ‘older’, I dont mean vintage machines, I mean, it is rare to see a vespa of more than maybe 10 years.  Everybody is driving modern, plastic faring, twist’n’go’s (though I have seen a few knackered old Tomos mopeds that I rather like ;-)
As part of the Kyoto agreement on global emission reduction, the Italians apparently got into a bit of a pickle a few years back as they had quite a stretching target to meet.  And so some bright bureaucratic spark came up with the then brilliant, but now disastrous idea of insentivising the nation with huge subsidies to trade in thier old smokey scooters, for brand new clean ones.  The rules were strict, and old traded-in machines had to be scrapped (unless broken down and sold for parts).  On the one hand this had a huge and positive impact on the air quality and environmental impact of italy, but on the other hand it stuffed the italian scooter manufacturing industry (leaving the market wide open for japanese scooters) and destroyed the iconic symbol of its national identity, culture and heritage.
So no more cool and suave on a vespa or lambretta.  Instead, skimpily clad nubiles and bermuda-shorted youths on suzukis, yamahas, MBKs CYMs(?) etc (though I have to admit that Piaggio and Aprilla still represents a good proportion of new scooters on the road)

Tuesday, July 06, 2010

Statistics

For those who might be interested here are some recent stats....
From the moment of shotblasting the frame (ie not including any time or money spent up until that moment), I have;
- spent 45 hours cutting and welding
- consumed 10 meters of welding rod
- consumed £40 of argon gas (i have got to get a better gas bottle and fill method. Current method is cheap for infrequent jobs but expensive for bigger jobs)
- ground away 1/4 of a tungsten tip
- removed nearly 2.5 kg of rust metal - presumably Ive replaced at least that much
- spent £52 on floor pan and replacement sheet metal

Thinking time

Oh what a disappointment. I had it all planned that I would get the scooter and parts all powder-coated this week, but when I phone Redditch shotblasting
***** News Flash******
TVOR BUYS A 1956 LAMBRETTA LD150
Old man has new excuse to fiddle in his shed
Watch this space for links to project progress
**********************
..But when I phoned Redditch shot blasting, they told me they couldnt do it this week..... and from next week I am on holiday (who would have though that a holiday would be so inconvenient).... so for one reason or another I can get the thing painted now for at least 6 weeks! Will it be all rusty again by then?
I am trying not to get too disappointed about this - in the grand scheme of things it doesn't actually make much difference to how quickly I get it back on the road - even painted I couldnt have done any rebuild for several weeks anyway. And so I am going to take the opportunity to reflect on the journey so far and think about colours and graphics - I am going to be in Italy for a a few weeks so will do lots of field research on Vespas in their natural habitat

Sunday, July 04, 2010

Just do it

I had a master plan - when dropping the frame off for powder coating (hopefully this week), to also drop off the side panels and tool box for shot blasting. Then when I collect the painted frame I could also collect the stripped other bits ready for panel beating and preping for powder coating another day.
But Ive blown that master plan out.
Instead Ive decided to take all the above (plus handle bar head and various brackets) to be painted at the same time (ie NOT bring it back here for work prior to painting) - it will be good enough. Ive bashed and straightened as much as I can, and am prepared to accept a few imperfections and just get everything coloured up - so I can get on with putting it all back together again. I dont want this to drag on longer that it needs to

final details

So I thought I was nearly there with the finishing... until I woke up in a sweat the other night thinking about all the things that I SHOULD really do seeings as Ive come this far.
Ive been really struggling with this balance between - making a good enough job, and making a job Im proud of. Sometimes I think "that'll do, it'll never be a show vehicle, just get it done and out of the way" and then in the next breath (or in this instance, middle of the night) Im thinking "you've come this far, why cut corners now and regret not doing it properly"
So in addition to the final bit of grinding, I also make up some strengthening plates for the mounting holes on at the rear of the frame that locates the side panels. This is quite a rusty area, but I had earlier made the decision not to replace all this metal figuring it would have meant virtually replacing half the vehicle. So I guess a reasonable compromise that might help me sleep easier was to make up these plates, and they certainly have given a lot more strength to this area.

Another thing that has been playing on my mind is the security of the bike when parked up outside pubs and other public places, and so I decided to weld a 1/4" bar loop onto the inside of the stand - so that I could thread a chain through. I know that it wouldn't stop a very determined thief, but it would slow opportunists down. It seemed like a very good idea to me - why dont they put a loop on here as a matter of course.
And while I was tossing and turning over the stand - I also decided to make up some plates to help spread the load that it places on the floor while on the stand (Ive seen some sort of plate kit offered in a magazine to overcome this problem)

Monday, June 28, 2010

And Finally......

Well it not 'finally' really - there is still loads to do, BUT, 'Finally' I get to weld the floor pan in.
It was a lovely sunny Sunday - and I was up early to make the most of it. Trouble is I was going to have to do some grinding - I went round to the neighbours to apologise in advance figuring that it would be harder for them to say 'no' that way.
Despite having (wanting!) to go out at lunch time to see eldest daughter perform a 'homeless project' I had the whole of this day to myself - and seeing as England were going to be playing Germany in the World cup (second round?) I was not going to be getting any hassle from anyone wanting me to do anything different.
The leading edge of the floor is butt welded to the trimmed leg shield, and the rear end is welded the lip of the bulk head and side panels. In between it should be a simple case of welding in those drilled out spot weld holes to join the new floor to the existing spine box section. Who said "simple"? There are over 30 of those holes and everyone was a pain in the ass. It was a real challenge to get a good weld in these. Firstly, to get a good wet pool in the base of teh hole (on the new floor metal) you have to either get a lot of power in there or spend a lot of time in there - it seemed very difficult to get this right (as if the arc didnt like it in an enclosed space) and I tried everything from 30 Amps up to 60 Amps. All this has to be balanced against minimising distortion, and minimising burning the hole out.
In the end I think I got the hang of it (but not until I had walked away from it for a while in frustration). The weld I believe is strong - penetration evident on the underside of the floor - but it is not pretty - even after grinding off its still pretty ugly. I can live with it..... I'll have to! Its as solid as a rock now, and I hope the paint will distract the eye. If worst comes to worst I shall have to put a lot of 'mod-bling' on it to distract viewers from the scooter itself

So thats it. its all welded up (as far as Im going to go anyway) - there is some bashing to be done still, and some final grinding (actually ive spotted a weld that needs doing too) but I reckon its only about another 3 hours and I can get it to the powder-coaters.

Floor pan

It feels like a long time getting to this point. After all, it was only a hole in the floor that I was supposed to be patching. But at long last, I finally got round to fitting the new floor pan.
I had done a research on the web about fitting a new floor (and there are surprisingly few references to it) and found a handful of suppliers selling what they claimed to be the right floor pan for a PX ('there is only one shape for a PX' etc). However not all of these 'correct' parts looked the same.... and not the same as the one I was replacing.
SIP (the German supplier of scooter bits) were showing thier replacement floor for £83 and yet some people were selling new replacement floors on ebay for 40 quid. On inspection of everyones accompanying photographs, it would appear the more expensive SIP floor has the rear cut out and upturned lip that my old floor suggested it once upon a time had. So I was getting myself prepared to spend 80 quid, when I spoke with Kevin at K n S scooters in Derby who told me that his floor for £40 was exactly the same as the SIP one (and that they made much more profit on theirs than he did) So I was delighted and as already explained in a previous blog entry went over last weekend to buy. HOWEVER. What Kevin had did not LOOK the same as the photo on the SIP site - no cut out or upturned lip. I bought it anyway, and a week later, I have finally got round to working out what all that Lip is about and whether I'd saved myself 40 quid or lost myself 40 quid on a rough copy.

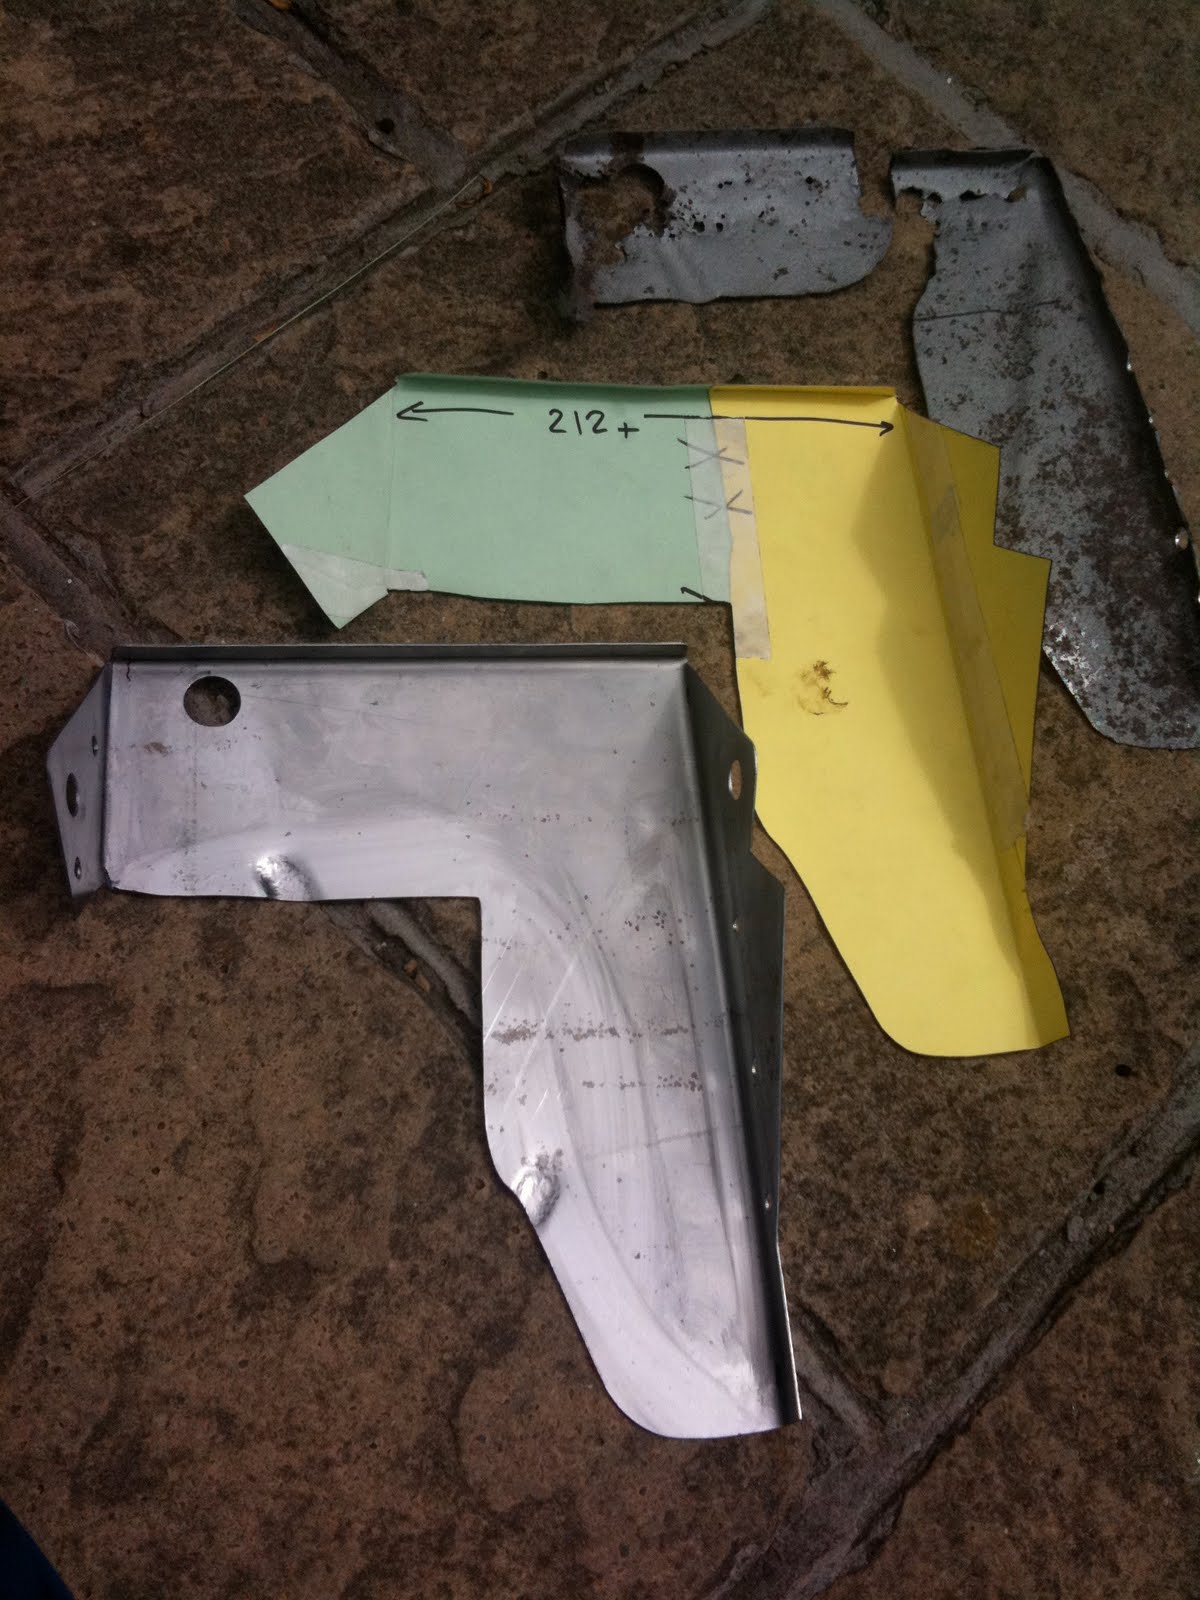
Well that Lip is essential - to join with the rear wheelarch bulkhead, and on very close inspection, someone had actually scribed some cut and fold lines on this replacement floor (so maybe thats what you pay your extra £40 to SIP for - to actually do the cutting and folding) - though Im not sure that the side flaps that Ive put in are standard - there was certainly something going on here in the old floor of my scooter, but I dont see any evidence of side flaps on the SIP part. However I chose to put these returns in to help strengthen the whole thing by welding them to the inside side panels.
I was encouraged to see these fine lines, but didnt follow then, choosing to mark out my own to suit my, now unique, frame conditions (there wasnt much difference in the end, but I felt happier to be sure).
Note, I do all my marking out with a scribe, but sometimes I use a marker pen to highlight which line to cut to - Ive been caught out before my marking several lines, then turning the piece upside down to get better access, and then cutting to the wrong line - so the pen marks you see in the photos are to help me make sure Im working to the right scribe line ;-)

Vin number replacement


I took the advice of TVOR and Hughie (see earlier post) to punch and weld in the VIN number so that there can be no argument with MOT inspection.
The number is what is on the V5 document..... but Im not convinced this number was ever on the frame. Is this a different frame? Who knows - there is no evidence to say otherwise, and so in all good faith, I have placed what is known as the VIN number for this vehicle onto the frame

Doh! from the look of the photo, Ive put it upside down!

Get rid of those last bits of rot

The spine of the frame isnt in too bad condition except for one or two places where the rust has found its way all the way through to the outside world (I wonder how long this process actually takes?) - So a good 3 or 4 hours work saw me cut out the, make new and weld back in.
My sheet metal clamps worked wonders here to hold the bits in place while I welded, but the magnets havent helped at all really - the magnetic field plays havoc with the welding arc - its impossible to TIG weld in close proximity to magnets.

I show the inside of the weld here in the last picture for no other reason but to prove to myself and perhaps an MOT inspector that the penetration on the welds is pretty good :-)


Sweat and tears

You see those splashes on the metalwork in this photo. They are popping up all over the frame.
Its rust. Rust from the sweat that I keep dripping as I work!.... or is it tears?
This week we have see the most glorious weather. I would love to have lazed in the sunshine with a cold beer or two, but instead have felt compelled to get this frame finished.
It means that I can work outside - bit more space and less risk of fire, but it also means that Ive been sweating buckets. And when its not dripping onto the frame, its dripping into my helmet - all very unpleasent.
Ive also got a bad case of welders neck burn. I would normally wear a t-shirt under my boiler suit but its been far to hot for that so the open neck of my boiler suit has left me with a bright red V on my chest

Saturday, June 26, 2010

bulk head back in place

Ive been waiting to do this bit right from the beginning. putting the bulkhead back that seperates the inside (dry-side) of the frame and the inside of the wheel arch (wet-side). Getting this in place is a psychological milestone - it makes me feel like its all going back together. Its also the bit that ties the two sides together, so it was important to get the space right between the two plates that hold the engine mounting. I cut a piece of tube to length and bolted it in place and then got welding. It was relatively straight forward as long as I could keep moving the frame around. Interestingly though, as I was working inside the wheelarch my auto-darkening welding helmet really struggled with the light differences and kept un-darkening mid-weld- very annoying.

Using the drilled out spotwelds as a welding point to join the new material back in to the existing is a bit tricky - you cant apply too much heat else it blows through - but at the same time it appears to need a good spark to get into the hole. Im getting better at it and hope ill have had enough practice before having to fit the new floor pan in... Oooh exciting! im getting dangerously close to having to do that now :-)